
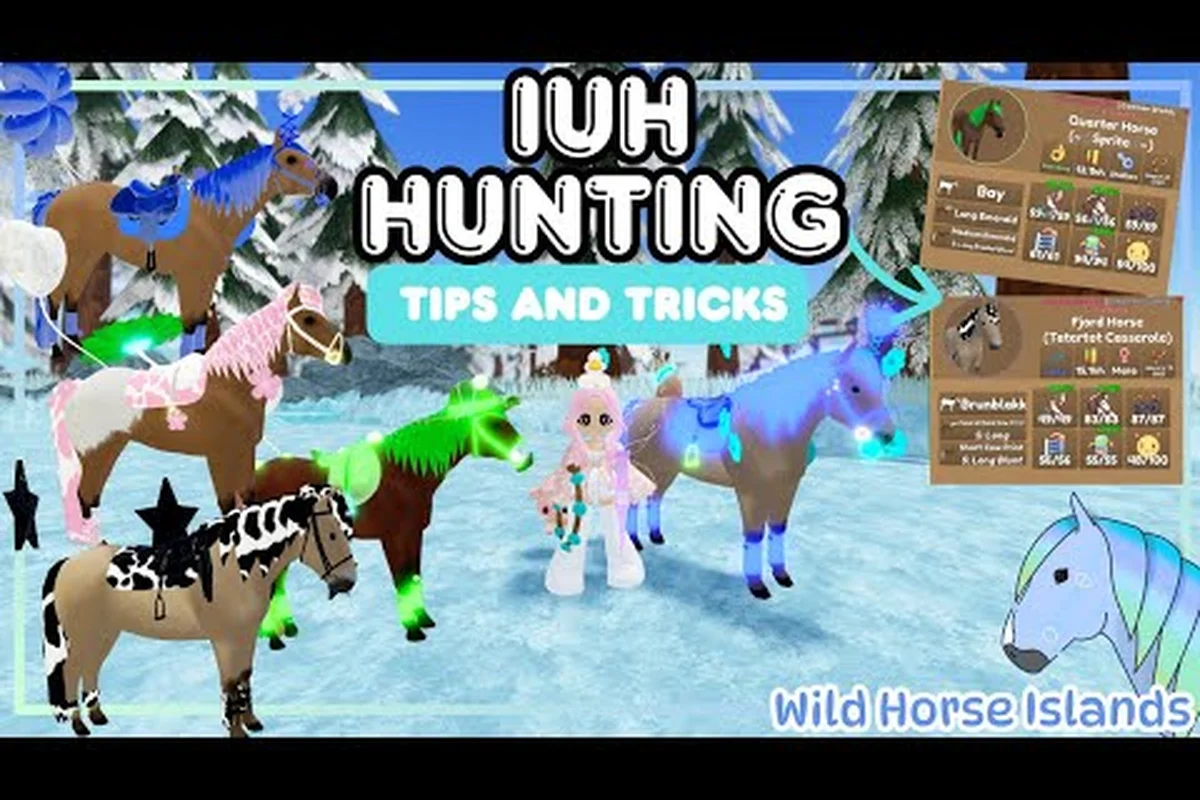
Learning wild horse islands how to catch a horse is the single most important skill you'll develop in the game, because every activity—breeding, trading, racing, and collecting—starts with a successful capture. The taming system might seem straightforward at first glance, but the difference between catching a common horse and landing a rare wild caught beauty comes down to understanding spawn mechanics, bonding mechanics, and the subtle details most new players miss. This wild horse islands taming guide breaks down everything you need to know, from your very first lasso throw to advanced techniques for catching the horses you actually want.
Understanding the Core Catching Mechanics in Wild Horse Islands
Before you charge at the first horse you see, you need to understand how the capture system actually works. Every horse on the map exists in one of two states: wild caught (WC) or herd caught (HC) , and this distinction matters far more than most beginners realize. The official Wild Horse Islands help center defines wild caught as any horse you capture while it's roaming freely on an island, while herd caught refers to horses that you tame from a group of horses that share a spawn point. This terminology isn't just flavor text—it directly affects trading value and how other players perceive your horse's rarity.
The actual catching process follows a consistent pattern regardless of which island you're on. You approach a horse slowly, equip your lasso from the hotbar, and hold down the interaction button when the prompt appears. The horse will resist by pulling away, and you need to manage the bonding meter that appears on screen. If the meter fills completely, the horse calms down and becomes yours; if it empties, the horse breaks free and you have to start over. The key insight here is that the bonding meter fills faster when you're closer to the horse and when you're not moving, which means patience genuinely pays off.
What most guides don't tell you is that your character's movement speed and direction affect the bonding process. If you strafe or back away while taming, the meter drains noticeably faster, and if you're sprinting when you initiate the capture, you'll start with a lower bond percentage. The optimal approach is to walk directly toward the horse, stop about two body lengths away, and initiate the tame while standing completely still. This gives you the maximum starting bond and makes the entire process significantly easier.
| Catching Method | Bond Start | Difficulty | Value Impact |
|---|---|---|---|
| Walk + Stand Still | 35-40% | Easy | Standard |
| Walk + Move During Tame | 20-25% | Medium | Standard |
| Sprint + Stand Still | 15-20% | Hard | Standard |
| Sprint + Move During Tame | 5-10% | Very Hard | Standard |
| Lasso from Distance | 25-30% | Medium | Standard |
The bonding meter mechanics also scale with the horse's rarity tier. Common horses bond quickly and rarely break free, while rare coats and event horses have much stricter bonding requirements that demand near-perfect technique. This is why experienced players emphasize practicing on common horses first—you build the muscle memory for timing and positioning before you risk losing a valuable spawn to a failed capture.
Wild Caught vs Herd Caught: Which Method Should You Use?
The Two-Account Cap and AFK Farming Rules
The official Player Rules impose a strict two-account cap for AFK farming, meaning you cannot run more than two accounts simultaneously to spawn-farm horses. Violating this cap risks account penalties, and the rules also prohibit cross-trading — exchanging in-game horses for Robux or real money. For catching efficiency, this means you should focus on active hunting routes rather than passive AFK methods. The 659M+ visit count means high server competition, so respecting the cap while using both accounts strategically on different islands maximizes your spawn coverage.
Spawn Location Rotation for Efficient Hunting
Wild horses spawn in defined locations and herds around each island, and understanding these spawn points is critical for efficient catching. Rather than wandering randomly, learn the specific herd spawn locations on each island and rotate between them systematically. The game's 659M+ visits mean high competition for spawns, so a rotation route that hits 3-4 herd locations per island in sequence outperforms camping a single spot. This strategy is particularly effective for rare horse hunting, as it maximizes the number of spawn checks per minute and reduces downtime between captures.
The choice between targeting wild horses or herd horses isn't just about personal preference—it's a strategic decision that affects your long-term goals in the game. Wild caught horses spawn individually across each island's terrain, while herd caught horses appear in groups of three to five at designated spawn points. According to the official game page on Roblox, wild horses spawn around each island in defined locations and herds, which means both methods are viable but require different approaches.
Wild caught horses offer the advantage of variety and potential rarity. Because they spawn individually, you can encounter a wider range of coats and breeds across a single island, and the spawn locations are more unpredictable. This unpredictability is actually a feature for hunters—you never know what you'll find around the next ridge, and that element of discovery keeps the gameplay fresh. The downside is that wild caught hunting requires more time and travel, since you're covering more ground to find each individual horse.
Herd caught horses are more predictable and efficient for beginners. Since herds spawn at known locations, you can memorize the spawn points on your favorite island and check them on a rotation. This makes herd hunting ideal for players who want to catch a specific breed or coat that appears in a known herd. The trade-off is that herd horses tend to be more common on average, and experienced traders often value wild caught horses higher because they're harder to obtain.
| Comparison Point | Wild Caught (WC) | Herd Caught (HC) |
|---|---|---|
| Spawn Pattern | Individual, scattered | Groups of 3-5 |
| Predictability | Low | High |
| Time Investment | High | Medium |
| Rarity Potential | Higher | Lower |
| Trading Value | Premium | Standard |
| Best For | Hunters, traders | Beginners, breeders |
Your choice between these two methods should align with your current goals. If you're just starting out and need a reliable horse to train and bond with, herd caught horses are the smarter play because they're easier to find and capture. If you're looking to build trading value or hunt for rare coats, wild caught is the only path forward. Many advanced players maintain a hybrid approach, checking herd spawns on their way between wild hunting routes to maximize their time on each island.
The pure wild caught (PWC) designation adds another layer to this system. A pure wild caught horse is one whose mane and tail colors match its coat color naturally, without any dye or customization. These horses are significantly rarer than standard wild caught horses and command premium prices in trading chat. When you're hunting for valuable horses, always check the mane and tail colors before you tame—if they match the coat, you've found something special.
Taming Your Very First Wild Horse Step by Step
Understanding the Pure Wild Caught (PWC) Distinction
A Pure Wild Caught (PWC) horse is a specific subset of Wild Caught (WC) where the mane and tail color exactly match the coat color. This distinction matters for trading value — a standard WC Arabian might be common, but a PWC Arabian commands premium offers in trading chat. When scouting herds, use the zoom feature to check mane and tail color before initiating the tame interaction. If they match, prioritize that horse, as PWC status is determined at spawn and cannot be altered after capture.
Bonding Item Efficiency for Rare Horse Captures
When targeting rare horses, the bonding item you carry determines capture success speed. The game's taming mechanics reward higher-tier bonding items with faster trust accumulation, reducing the risk of the horse fleeing during the tame interaction. For IUH (Island Unique Horse) hunting, as demonstrated in Whimzy's 12-minute guide, carrying multiple high-tier bonding items is essential — a single failed capture on a rare spawn can mean waiting through the full respawn cycle. Compare this to common horses, where basic items suffice, and you'll see why inventory preparation separates successful rare hunters.
Now that you understand the theory, let's walk through the actual taming process from start to finish. This step-by-step breakdown covers everything from your first approach to leading your new horse back to your stable, and it's designed to work for players who have never successfully caught a horse before.
Step 1: Prepare Your Inventory
Make sure your hotbar has a lasso equipped before you start hunting. You can purchase lassos from the shop on Pinehaven for a small amount of coins, and it's worth buying several so you don't run out mid-hunt. You should also bring food items like apples or carrots, which can be fed to a horse after capture to increase its bond level and make it easier to lead.
Step 2: Locate a Target
Scan the island for a horse that catches your eye. For your first capture, aim for a common breed like a Morgan or Quarter Horse rather than a rare coat. The simpler the horse, the easier the bonding process will be, and you can practice your technique without the pressure of losing something valuable.
Step 3: Approach Slowly
Walk toward your target at a normal pace, avoiding sudden movements. The horse will react to your approach by looking at you and occasionally stepping away, but it won't flee unless you sprint or get too close too quickly. Stop about two body lengths away from the horse and wait a moment for it to settle.
Step 4: Initiate the Tame
When you're in range, the interaction prompt will appear. Hold down the interaction button to start the taming process. The bonding meter will appear above the horse's head, and you'll see it start to fill. Keep holding the button and stay completely still—any movement will slow the meter's progress.
Step 5: Manage the Bonding Meter
The bonding meter fills steadily as long as you maintain the correct position. If the horse starts pulling away, you'll see the meter begin to drain. When this happens, release the button briefly and reposition yourself closer to the horse, then resume holding. This push-and-pull dynamic is the core challenge of taming, and it gets easier with practice.
Step 6: Lead Your Horse Home
Once the bonding meter fills completely, the horse is yours. You'll see a confirmation message, and the horse will follow you when you walk. Lead it back to your stable or pasture to secure it, and consider feeding it a treat to boost its bond level before you start training.
| Taming Step | Common Mistake | Correct Technique |
|---|---|---|
| Approach | Sprinting at the horse | Walk at normal speed |
| Positioning | Standing too far away | Two body lengths max |
| Bonding | Moving during tame | Stay completely still |
| Meter Management | Panicking when meter drops | Reposition and resume |
| Post-Capture | Forgetting to feed | Use apples or carrots |
The entire process takes about thirty seconds for a common horse, but rare horses can take several minutes of careful meter management. If you're struggling with a particularly stubborn horse, try feeding it a treat before you initiate the tame—this gives you a small bonding bonus that can make the difference between success and failure.
Best Food and Bonding Items for Successful Captures
Food plays a surprisingly important role in the catching process, and knowing which items to use can dramatically improve your success rate. The official trading community has documented that different foods provide different bonding bonuses, and experienced players always carry a selection of treats when they go hunting.
Apples are the most basic bonding food and provide a modest boost to the bonding meter when fed to a horse before or during taming. They're cheap, easy to find, and effective enough for common horses. Carrots offer a slightly stronger bonding bonus and are preferred by players who hunt medium-rarity horses. Golden apples are the premium option, providing a significant bonding boost that can turn a difficult capture into an easy one, but they're rare and expensive.
| Food Item | Bonding Bonus | Rarity | Best Use |
|---|---|---|---|
| Apple | +5% | Common | Beginner captures |
| Carrot | +10% | Common | Medium-rarity horses |
| Golden Apple | +25% | Rare | Rare coats, stubborn horses |
| Hay Bale | +8% | Common | Herd horses |
| Berry Mix | +12% | Uncommon | Wild caught hunting |
The timing of when you feed the horse matters just as much as what you feed it. Feeding before you initiate the tame gives you a higher starting bond percentage, which makes the entire process easier. Feeding during the tame can recover a dropping meter, but it requires you to release the interaction button briefly, which carries some risk. Most experienced players feed before taming and save their food for emergencies during the capture.
Your bond level with a horse also affects how easily it follows you after capture. A horse with high bond will follow you reliably across long distances, while a low-bond horse might stop or wander off. This is especially important when you're leading a horse back to your stable from a distant island, so don't skip the post-capture feeding step.
Advanced Catching Techniques for Rare Horses
Once you've mastered the basics, you can start applying advanced techniques that dramatically improve your chances of catching rare and valuable horses. These strategies come from the community's collective experience and have been refined over thousands of hours of hunting.
Route optimization is the foundation of successful rare horse hunting. Instead of wandering randomly, experienced players memorize the spawn locations on each island and develop efficient routes that cover all of them in a single sweep. This approach maximizes your encounters per hour and gives you more opportunities to spot rare coats. The rare horse hunting guide covers route planning in detail, but the core principle is simple: know where horses spawn, and check those locations systematically.
Timing your hunts around server resets can also improve your odds. When a server resets, all horses respawn, which means you get a fresh batch of potential captures. Players who log in right after a reset have the best chance of finding rare spawns before other hunters claim them. This is especially important on popular islands where competition for rare horses is fierce.
Patience and persistence are the real secrets to rare horse hunting. The bonding meter mechanics don't change based on rarity, but rare horses are more likely to break free and require more attempts. Don't get discouraged if you fail a capture—every attempt builds your skill, and the next spawn might be the one you're looking for.
| Advanced Technique | Time Investment | Success Impact |
|---|---|---|
| Route Optimization | Medium | High |
| Server Reset Timing | Low | Medium |
| Food Preparation | Low | High |
| Bond Level Building | Medium | Medium |
| Multi-Island Rotation | High | Very High |
One technique that separates successful hunters from casual players is multi-island rotation. Instead of staying on one island, advanced players cycle through multiple islands in a single session, checking the best spawn locations on each before moving on. This approach maximizes your exposure to different horse populations and increases your chances of finding something truly special. It requires more travel time, but the payoff can be substantial.
Common Catching Mistakes and How to Fix Them
Even experienced players make mistakes when catching horses, but knowing what those mistakes are can help you avoid them. The community has identified several common errors that cost players valuable captures, and fixing these issues will dramatically improve your success rate.
Sprinting at horses is the most common beginner mistake. The horse's AI is programmed to flee when it detects sudden movement, and sprinting triggers that response instantly. Always approach at a walk, and resist the urge to close the final distance quickly. The extra few seconds of walking are worth the reduced risk of spooking the horse.
Moving during the tame is the second most common error. The bonding meter drains when your character moves, even slightly, and many players instinctively strafe or adjust their position while holding the interaction button. Train yourself to stand completely still during the tame, and only move when the meter has dropped enough to require repositioning.
Ignoring the bonding meter is a mistake that costs players captures they should have won. The meter gives you real-time feedback on your taming progress, and watching it closely lets you react to problems before they become failures. If you notice the meter dropping, release the button, reposition, and resume before the horse breaks free.
| Mistake | Frequency | Impact | Fix |
|---|---|---|---|
| Sprinting at horses | Very Common | High | Always walk |
| Moving during tame | Very Common | High | Stand still |
| Wrong food choice | Common | Medium | Match food to rarity |
| Poor positioning | Common | Medium | Stay close, stay centered |
| Giving up too early | Uncommon | High | Persist through failures |
The horse catching tips that experienced players swear by all come down to one principle: control your inputs and stay calm. The taming system rewards deliberate, patient play, and punishes rushed decisions. If you can master the mental game of staying calm when the meter drops and staying focused through multiple failed attempts, you'll catch more horses than players with better reflexes but worse composure.
If you're still struggling with the lasso mechanics specifically, the how to lasso guide breaks down the aiming and throw mechanics in detail. Many players find that their issue isn't with the bonding system at all, but with the lasso throw itself, and fixing that one skill makes everything else click into place.
Frequently Asked Questions
What is the difference between wild caught and herd caught horses?
Wild caught horses are captured while roaming freely on an island, while herd caught horses come from groups at designated spawn points. Wild caught horses generally have higher trading value because they're harder to find and capture. Pure wild caught horses, where mane and tail match the coat, are the rarest and most valuable.
How do I increase my chances of catching a rare horse?
Focus on route optimization and server reset timing. Learn the spawn locations on your target island and check them systematically. Log in shortly after server resets for fresh spawns. Bring golden apples for the bonding bonus, and practice your taming technique on common horses before attempting rare captures.
Why does the horse keep breaking free during taming?
The horse breaks free when the bonding meter empties completely. This usually happens because you're moving during the tame or standing too far away. Stay completely still while holding the interaction button, and reposition yourself closer if the meter starts dropping. Feeding the horse before taming also gives you a higher starting bond.
What food should I bring for catching horses?
Apples work fine for common horses, but carrots provide a stronger bonding bonus for medium-rarity captures. Golden apples offer the best bonus at 25% and are worth carrying for rare horses. Feed the horse before initiating the tame for a higher starting bond percentage.
Can I catch horses on any island?
Yes, horses spawn on every island, but breed rarity scales with progression—Pinehaven offers common breeds like the Pinto, while advanced islands like Verdant Valley spawn rarer coats. Focus your Wild Caught (WC) hunting on higher-tier islands for better trading value, and check the horse locations guide for exact spawn points.